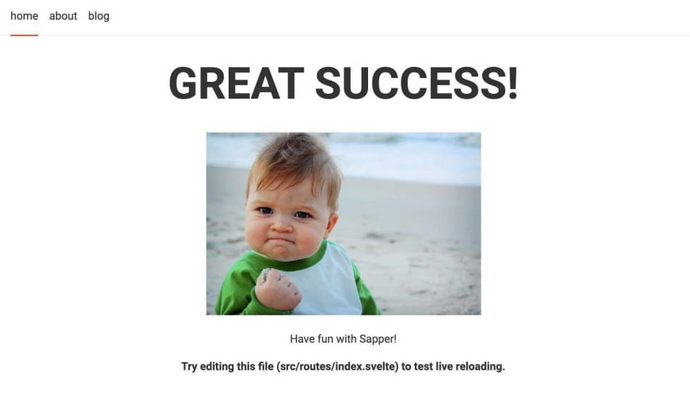
In this post I’ll assemble some libraries to form a simple web framework prototype with Svelte as the frontend for a PostgREST API backend.
Here’s a quick overview of the tech we’ll use in this tutorial:
- PostgREST is a server for the PostgreSQL database for rapid development of an API directly on top of the database. No middle-layer Ruby / PHP / C# code needed. I like to be close to the database and SQL whenever possible, so PostgREST is a great fit.
- Svelte is a newish JavaScript frontend framework. There sure are a lot of those, aren’t there? This one differentiates itself by rethinking the approach to reactivity. Svelte’s vanillajs-first approach also appeals to me.
- Sapper is a minimal web framework for building Svelte web apps. With its simple routing and web page scheme, Sapper helps you build a server-side rendered app that behaves like a single page app (SPA).
First we’ll need a few prerequisites:
- PostgreSQL. Download & install: https://www.postgresql.org/download/
- PostgREST. Installation instructions: http://postgrest.org/en/v7.0.0/install.html
- NPM. Installation instructions: https://www.npmjs.com/get-npm
Okay, let’s begin.
PostgREST
PostgREST will serve as the API backend for the app. Follow the official PostgREST tutorial to get your server up and running.
Here’s an example config file svelterest.conf:
db-uri = "postgres://authenticator:mysecretpassword@localhost:5432/postgres"
db-schema = "api"
db-anon-role = "webuser"
server-port = "5001"
Note: I’ve set the port (arbitrarily) to 5001. The Sapper server runs on 3000 by default, so this way we’ll avoid a collision where the two servers try to use the same port.
I’ll assume that we have a /todos API endpoint available from PostgREST per the tutorial. Adjust for your situation as necessary.
Let’s start the server from the terminal:
./postgrest svelterest.conf
We can test that the server with a simple curl command, which will return a JSON response.
curl http://localhost:5001/todos
[
  {
    "id": 1,
    "done": false,
    "task": "finish tutorial 0",
    "due": null
  },
  {
    "id": 2,
    "done": false,
    "task": "pat self on back",
    "due": null
  }
]
Great, now we have a PostgREST API available for testing.
Svelte & Sapper
We’ll need a Sapper application for the frontend. We’ll install it with the npx package execution utility. If you don’t already have that, install it:
npm install -g npx
Next let’s pull down a copy of the the official Sapper template.
npx degit "sveltejs/sapper-template#rollup" svelterest
cd svelterest
npm install
npm run dev

Now we have the frontend in place.
Postgrest-JS
Of course we’ll want a way to communicate between the Sapper application and the PostgREST API. For that we’ll want the postgrest-js library from Supabase.
npm install --save @supabase/postgrest-js
We’ll next need to take a look at the /src/routes folder and create a new Svelte template todos.svelte which can interact with the database:
<script>
    import { onMount } from 'svelte';
    import { PostgrestClient } from '@supabase/postgrest-js';

    let client = new PostgrestClient('http://localhost:5001');
    let todos;

    onMount(async () => {
        await client
            .from('todos')
            .select('task')
            .then(data => {
                todos = data;
            })
    });
</script>

<svelte:head>
    <title>TODOs</title>
</svelte:head>

{#if todos}
    <ul>
    {#each todos.body as todo}
            <li>{todo.title}</li>
    {/each}
  </ul>
{/if}
If everything worked correctly, you ought to see a list of the two tasks when you visit your frontend at http://localhost:3000/todos
Graphile-Worker
Though not critical, I think it’s important to have a way to execute long-running jobs in the background without interrupting the web session for the user.
We’ll use graphile-worker. It’s a job queue built for PostgreSQL, is based on NOTIFY and LISTEN, and is specifically intended for use with systems built on PostgREST (or PostGraphile).
npm install --save graphile-worker
Per the instructions from the repo we’ll create a directory called /tasks and place in it a task file called hello.js.
module.exports = async (payload, helpers) => {
  const { name } = payload;
  helpers.logger.info(`Received - ${name}`);
};
Once you’ve authenticated graphile-worker to the database it automatically installs a graphile_worker schema and tables to process jobs. No other database configuration needed. Neat!
Execute the worker in a separate terminal.
npx graphile-worker -c "postgres://user:password@localhost:5432"
The service is now listening for a NOTIFY signal from a job. There are none yet, so let’s add one. Evaluate the following code from a SQL console connected to your database:
SELECT graphile_worker.add_job('hello', json_build_object('name', 'My simple task'));
The terminal running the worker should output Received - My simple task. Hooray!
Next Steps
I plan to write a sequel or revisit this post with updates, particularly to push an example repo to Github. Maybe one day you’ll return to reminisce about the time you found this blog post on the internet, and be pleasantly surprised to find a link to Part 2. Maybe!
For now I leave these next steps as an exercise for the reader:
- I’d like to look into this repo more in the future: https://github.com/graphile/migrate. Database migrations written in standard Postgres-flavored SQL syntax.
- Add TailwindCSS styling to the frontend.
- Authentication is necessary. A JWT auth implementation is likely the best move, but I’m also interested in exploring this repo with session-based auth: https://github.com/monacoremo/postgrest-sessions-example
